
Template Library tutorial
The Library gathers ready-to-install templates for your account: workflows, forms, dashboards and apps. With one click you get something that works, and you only need to connect your credentials. This tutorial covers every feature, from start to finish.
1. Find a template
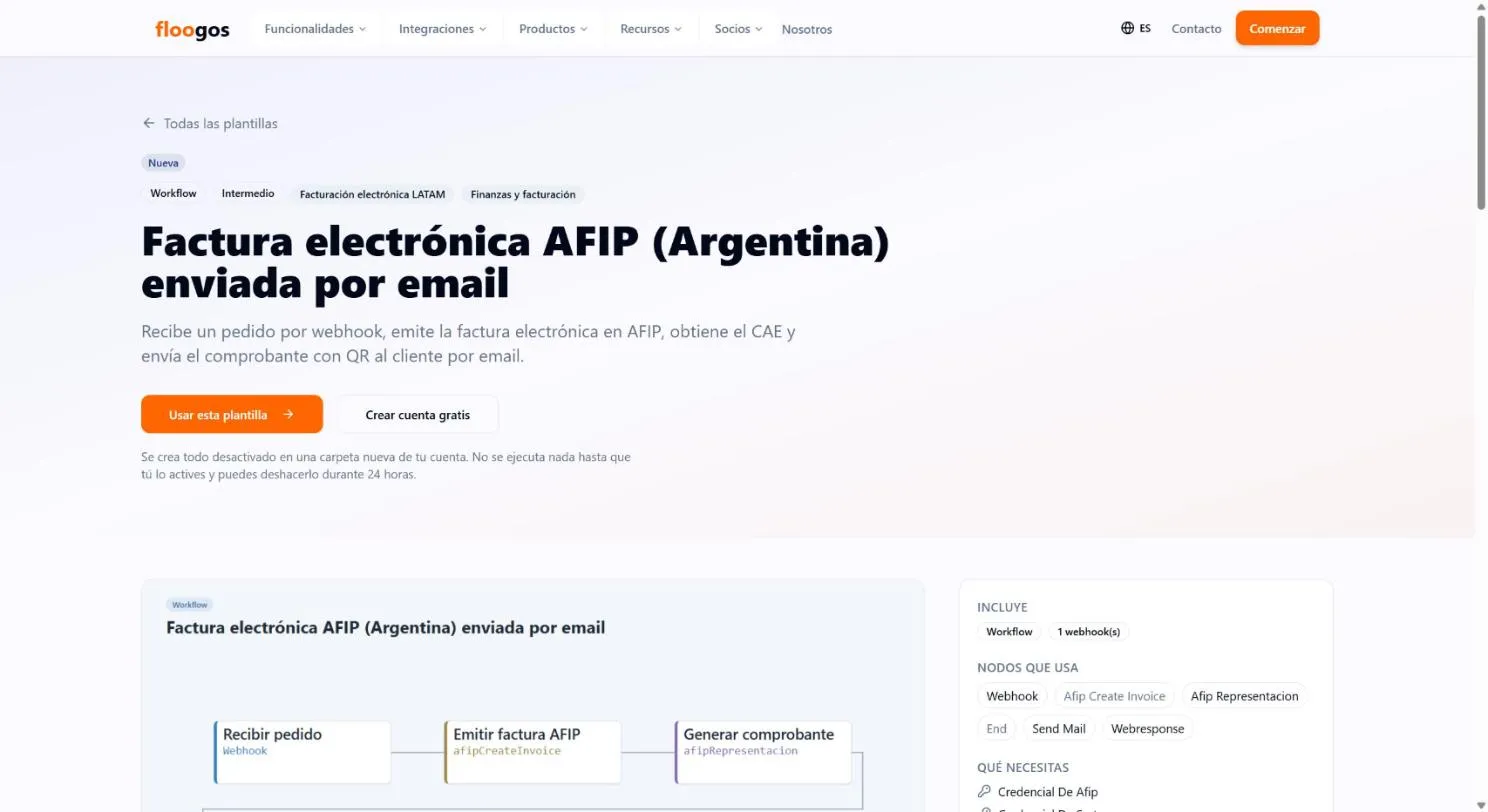
Section titled “1. Find a template”You can browse the catalog without signing in on the public Floogos website (floogos.com/templates) and, when you find one, click Use this template to install it in your account.
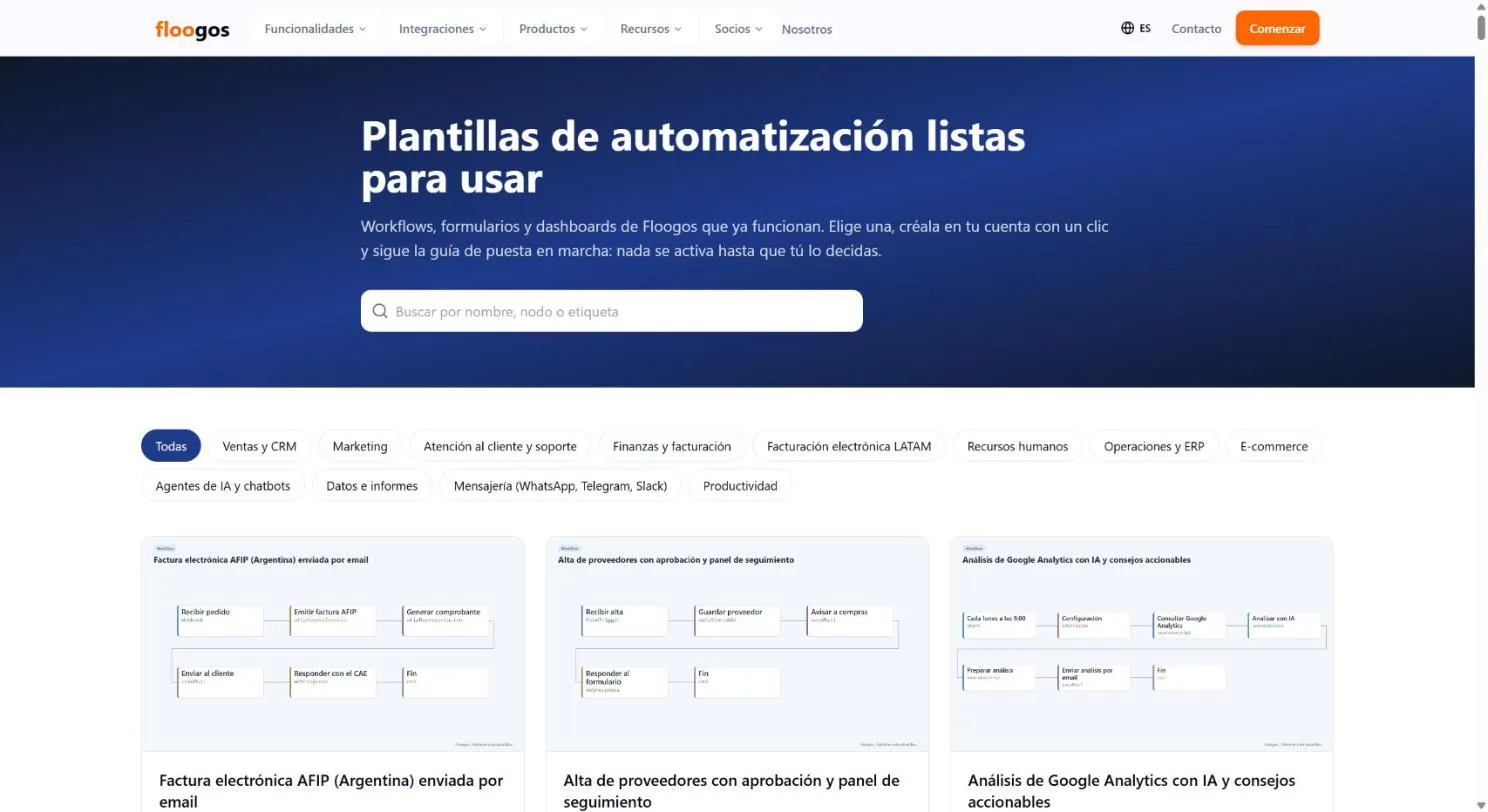
Inside the app, open Library in the side menu.
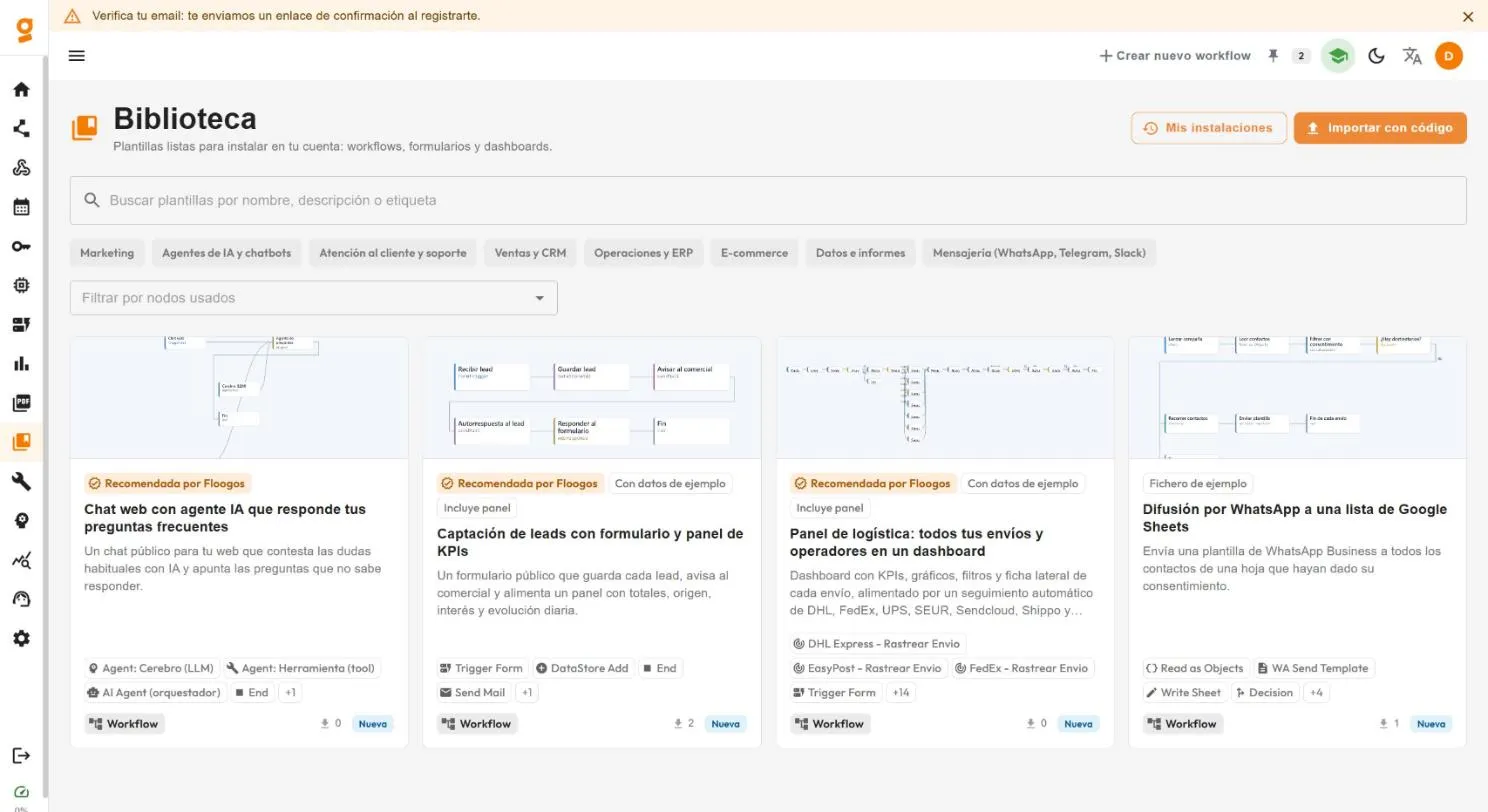
Open Library in the side menu. Published templates appear as cards.
- Search: type a name, part of the description or a tag in the top box.
- Categories: filter by use case (sales, logistics, customer support, etc.). You can select several.
- Filter by nodes used: pick one or more nodes (for example Google Sheets or WhatsApp) to see only the templates that use them.
- Order: templates are sorted by relevance; those recommended by Floogos and the best rated come first.
Each card shows the content type (Workflow, Form, Dashboard or App), the number of installs and the badges described below.
2. Understand badges and labels
Section titled “2. Understand badges and labels”Badges are computed from real data; nothing is filled in artificially.
| Badge / label | Meaning |
|---|---|
| Recommended by Floogos | Reviewed and highlighted by the Floogos team. |
| Most installed / Popular | Among the most installed by other users. |
| Highly rated | Has a good share of positive ratings. |
| New | Recently published or still has few ratings. |
| Includes sample data | You can install it with fictitious data to see the panels filled in. |
| Includes dashboard | Comes with a ready-made dashboard. |
| Sample file | Includes files to download so you can see how your spreadsheet should look. |
3. Review the details before installing
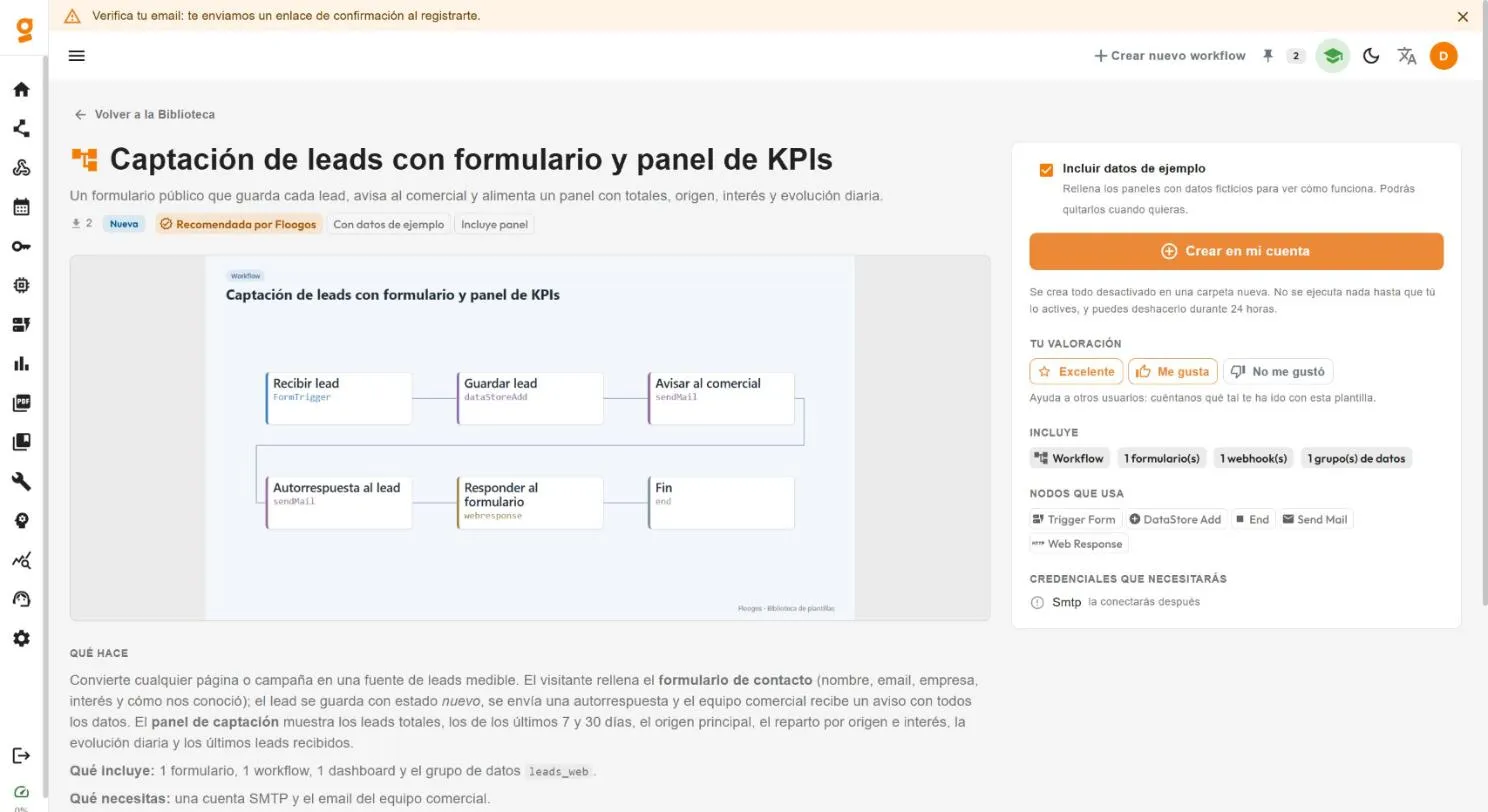
Section titled “3. Review the details before installing”Click a card to open its page (the public website shows the same information and a Use this template button). You will find:
- What it does: the use case.
- How to set it up: the steps you will follow.
- Includes: how many workflows, forms, dashboards and data groups will be created.
- Nodes it uses: the nodes in the flow.
- Credentials you will need: each one is shown as you already have it or you will connect it later.
- Gallery: images of the template, if any.
4. Install
Section titled “4. Install”- On the template page, check (or not) Include sample data (see section 6).
- Click Create in my account.
- Floogos creates the workflows, forms, dashboards and data groups in a new folder, all inactive.
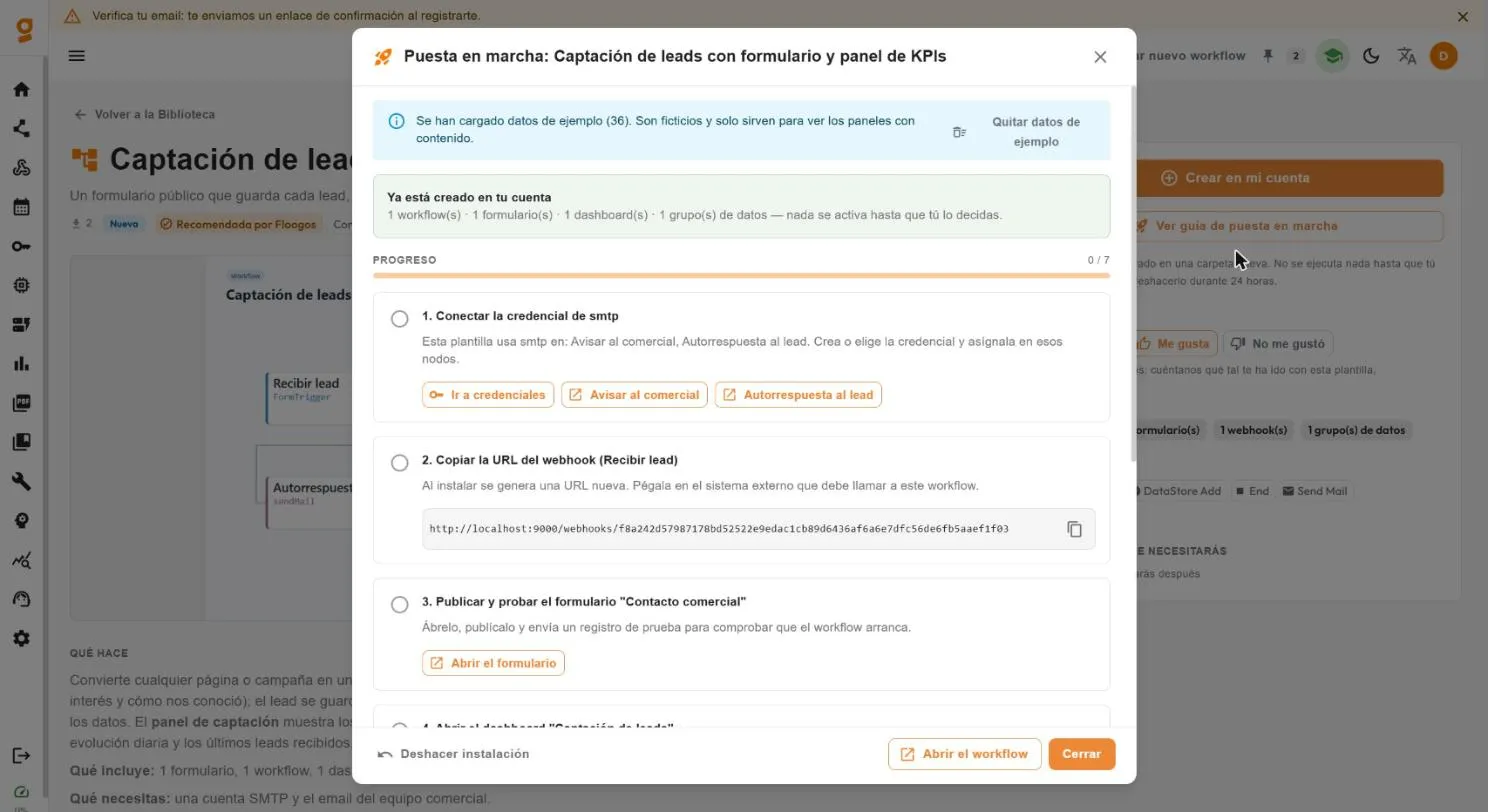
- The setup guide opens automatically.
If anything fails, nothing is created: installation is all or nothing.
Addresses and links unique to each installation
Section titled “Addresses and links unique to each installation”Every time you install a template, Floogos generates new webhook URLs for its workflows and a new public link for its forms, and reassigns everything that uses them (forms that trigger a workflow, dashboards that open a form or call a webhook). What you install never points to the template’s original or to another of your installations: you can install the same template several times without them mixing.
Publishing forms and dashboards when installing
Section titled “Publishing forms and dashboards when installing”By default everything is created unpublished. In the “Create the app in your account” box, the Publish when installing (optional) section lists the template’s forms and dashboards: tick the ones you want to leave with a public link (anyone with the link can open them). Forms that ask for login say so. Workflows stay inactive until you activate them, so a public form will not send anything to its workflow until then. You can publish or unpublish later from each form or dashboard.
Import with a code
Section titled “Import with a code”If someone gave you a code in the format FLGS-XXXX-XXXX, click Import with code, paste it and click Continue. You will see what the template includes before installing it, just like any other.
5. The setup guide
Section titled “5. The setup guide”The guide takes you step by step until the template is working. At the top you will see a summary of what was created and a Progress bar.
Steps can be of several kinds:
- Connect credentials: Go to credentials takes you to configure them. The step is checked automatically once the credential exists (Checked automatically).
- Open the form / dashboard / workflow: shortcuts to what was created.
- Copy a value: for example a webhook URL; click Copy.
- Manual actions: click Mark as done when you complete them.
- Activate: the Activate button turns on the main workflow. Do it last, when everything else is ready.
Good to know shows useful notices. For example, if you already had a data group with the same name, the template uses one with a different name so your data is not mixed, and tells you here.
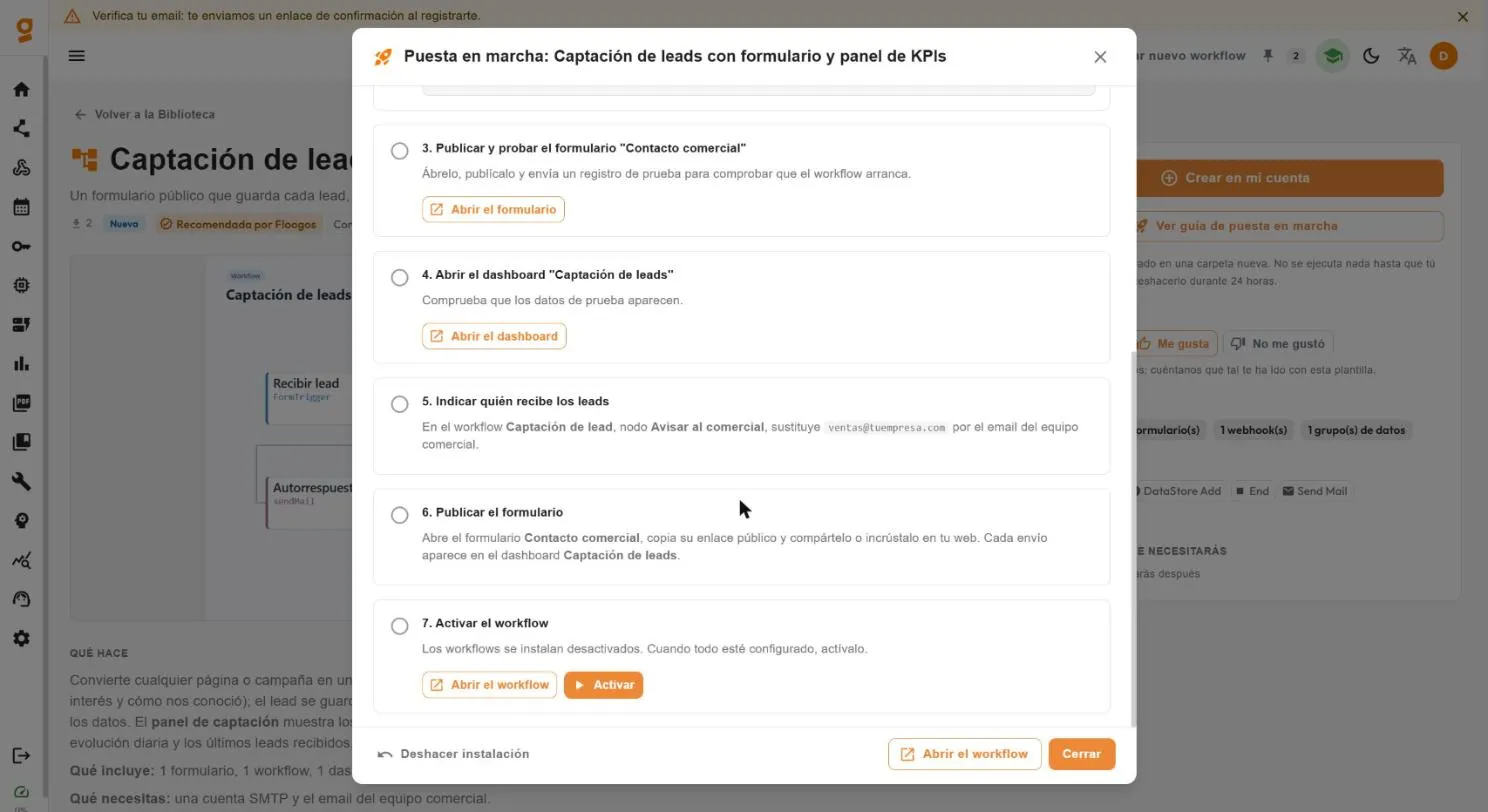
You can close the guide and come back anytime from My installs (section 9).
6. Try it with sample data
Section titled “6. Try it with sample data”If you installed with Include sample data, dashboards show fictitious information so you can see how they will look. The guide reminds you with Sample data has been loaded.
When you want to start with your real data, click Remove sample data. Only the fictitious data is deleted.
7. Sample files for your spreadsheet
Section titled “7. Sample files for your spreadsheet”Many templates read or write Google Sheets or Excel (Microsoft 365). In the guide’s Sample files for your spreadsheet section you can download files with the right header and fictitious rows, and import them into your sheet to see how it should look.
The “Cargar datos de ejemplo” workflow
Section titled “The “Cargar datos de ejemplo” workflow”If the template uses Google Sheets or Excel, a manual workflow named Cargar datos de ejemplo (“Load sample data”) is also installed. It writes the header and fictitious rows directly into your sheet, with no manual import.
It is installed inactive and is not part of the main flow. To use it: set the document and the sheet credential, and run it once by hand. You do not need to activate it.
8. Rate the template
Section titled “8. Rate the template”Once you have tried it, help other users in the Your rating panel:
- Excellent, Like or Did not like it.
A template shows its percentage of positive ratings once it has a minimum number of votes; until then it appears as New.
9. My installs and undo
Section titled “9. My installs and undo”Click My installs to see your history: what you installed and when. From there you can open the guide again to resume setup.
To undo an installation, click Undo install in the guide and confirm:
- The workflows, forms and dashboards created by that installation are deleted.
- It is only possible during the first 24 hours and while the workflows are still inactive.
- Once undone, it appears as Undone in the history.
Quick summary
Section titled “Quick summary”- Search and filter in Library.
- Open the page and check credentials and what it includes.
- Create in my account (with or without sample data).
- Follow the guide: credentials, spreadsheets, testing.
- Activate the workflow when everything is ready.
- Remove sample data and rate the template.
Does installing a template run anything? No. It only creates the items inactive. They run when you decide.
Does my data get mixed with the template’s? No. If a data group already exists, the template uses one with a different name.
Can I install the same template twice? Yes. Each installation creates its own folder.
The template asks for a credential I don’t have. Click Go to credentials in the guide. You can install first and connect later.